
Pictures and Video of the Attachable Hand Cycle built from Recycled Mountain Bikes. Bike was featured on the front page of the San Luis Obispo Tribune, click here to view article.
-
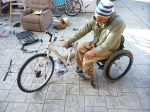
- Simple enough to handle from wheelchair. “Quick and Dirty” was the goal.
-
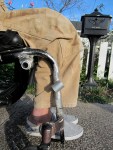
- Front of wheelchair propped up on old bicycle seat, finding correct angle for attaching the hand cycle.
-
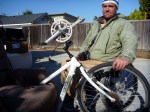
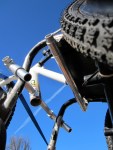
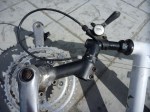
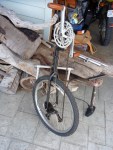
- Recycled mountain bike with crankshaft replacing handle bars and rear wheel fitted into front fork.
-
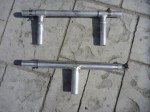
- Crankshaft welded to handle bar neck, front fork with geared rear wheel attached.
-
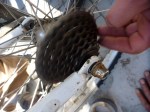
- Original rear wheel from mountain bike attached to the front fork, fork was spread to meet rear wheel quick release shaft.
-
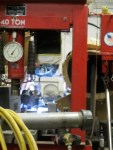
- A skilled aluminum welder was necessary for this project.
-
- Picture showing the welds that attach the T shaped aluminum rod to the chair. This free hanging T shaped rod feeds into the upper tube of the cut-up bicycle frame. The T-rod can be removed, leaving just the 2 2in tube sections welded to the chair.
-

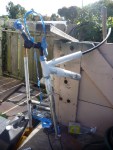
- This picture shows the free hanging T-rod attached to the chair via the 2 2in tube sections that are welded to the chair. The T-rod is also feeding into the top tube of the bicycle frame creating the first of the three hand cycle attachment points.
-
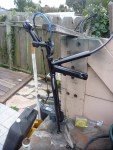
- Wheelchair and hand cycle after a long night in the metal shop.
-
- Standard aluminum tubing, welded, creates rigid attachment between hand cycle and wheelchair
-
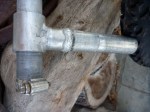
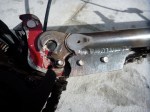
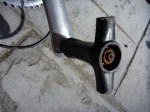
- Leaving the tubes free spinning allows for easier attachment by person using the wheelchair. Notice the weld ring on the attachment tube, this accident created a nice stopping mark, keeping the tube from sliding to far into the attachment tube on the wheelchair.
-
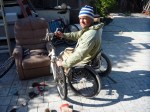
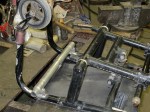
- View shows attachment points, with hand cycle attached. Very important that they do not interfere with regular function of the chair. This is my full time wheelchair, with or without the hand cycle attached.
-
- Four 2in tube sections were welded to the chair creating the attachment points. Two on this side, two on the other.
-
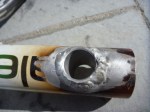
- Aluminum housing tube welded inside the bottom tube of a canondale mountain bike frame.
-

- De-railer and 2 chains salvaged from donor bicycle. Two chains were combined into one long chain. De-railer was re-adjusted once attached to the front bicycle fork, allowing for shifting through all 7 gears.
-
- Ready for it’s first trial run.
-
- Backside of steel plate that was welded to the bicycle fork for the de-railer attachment point.
-
- De-railer bolted to front fork.
-
- Picture showing steel plate welded bottom right leg of the bicycle point allowing for bolted de-railer attachment. Standard de-railer was scrapped from the rear of donor bicycle.
-
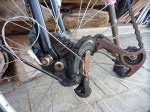
- De-railer was easily tuned to drop chain onto all 7 gears.
-
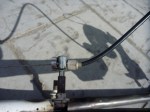
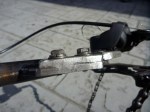
- Original front brake bracket used to hold shifter cable.
-
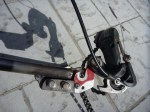
- Lower end assembly to date. Notice alignment and attachment of de-railer, also de-railer shifting cable being fed through original front brake lines. So far I have needed a front brake. The front wheel spins freely. One hand on the pedal crank and the other on a rear chair wheel hand rail brings the unit to a nice controlled stop.
-
- Shifter for the de-railer was re-attached to the bicycle neck. Shifter cable was run through the old brake cable housing. The use of two different bicycle necks bolted to together created the necessary crankshaft angle. Crankshaft housing was welded to the second bicycle neck.
-
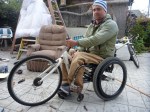
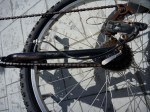
- Prior to paint. Notice front fork legs were bent straight in order to perfect the very important angle of the front wheel, affecting the heigth that the wheelchairs casters come off the ground as well as the amount of weight on the front drive wheel.
-
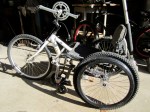
- Paint job makes her look like a $2000 off the shelf unit. Total actual cost was a few willing hands and a little time.
-
- Original pedal assembly left on crankshaft and stripped down for the first few trial runs.
-
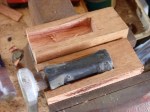
- Making two piece wooden handles for the remaining pedal assembly.
-
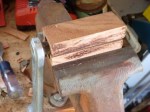
- Wooden hand pedals ready for shaping.
-
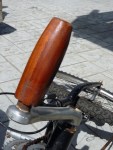
- Finished wooden hand pedals. Literally a nice touch.
-
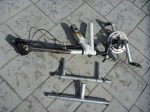
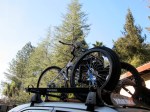
- All the necessary attachable pieces of the Hand Cycle, minus the wheel.
-
- Latest and greatest, ready for a ride. Please send us your ideas or links to your own build.


1 comment
Comments feed for this article
October 8, 2011 at 6:18 pm
Bill
Amazing post. I cannot agree more with you.